Features
- 3D renderer for a Rubik's Cube built from scratch with OpenGL
- Able to simulate Rubik's Cube moves really fast. Up to 10 million moves per second.
- Quickly find near-optimal solutions for a given scramble. Usually finds solutions using at most 22 moves within a couple of seconds.
- Theoretically will find an optimal solution, if given enough time. (However, for most scrambles this could take a couple of hours).
- All of this solving is aided by huge lookup tables (up to 1GB in size, depending on the algorithm).
- Can scan a physical Rubik's Cube using OpenCV, so that you can then find near-optimal solutions for it.
- Can communicate with a Lego EV3 robot to solve a physical Rubik's Cube.
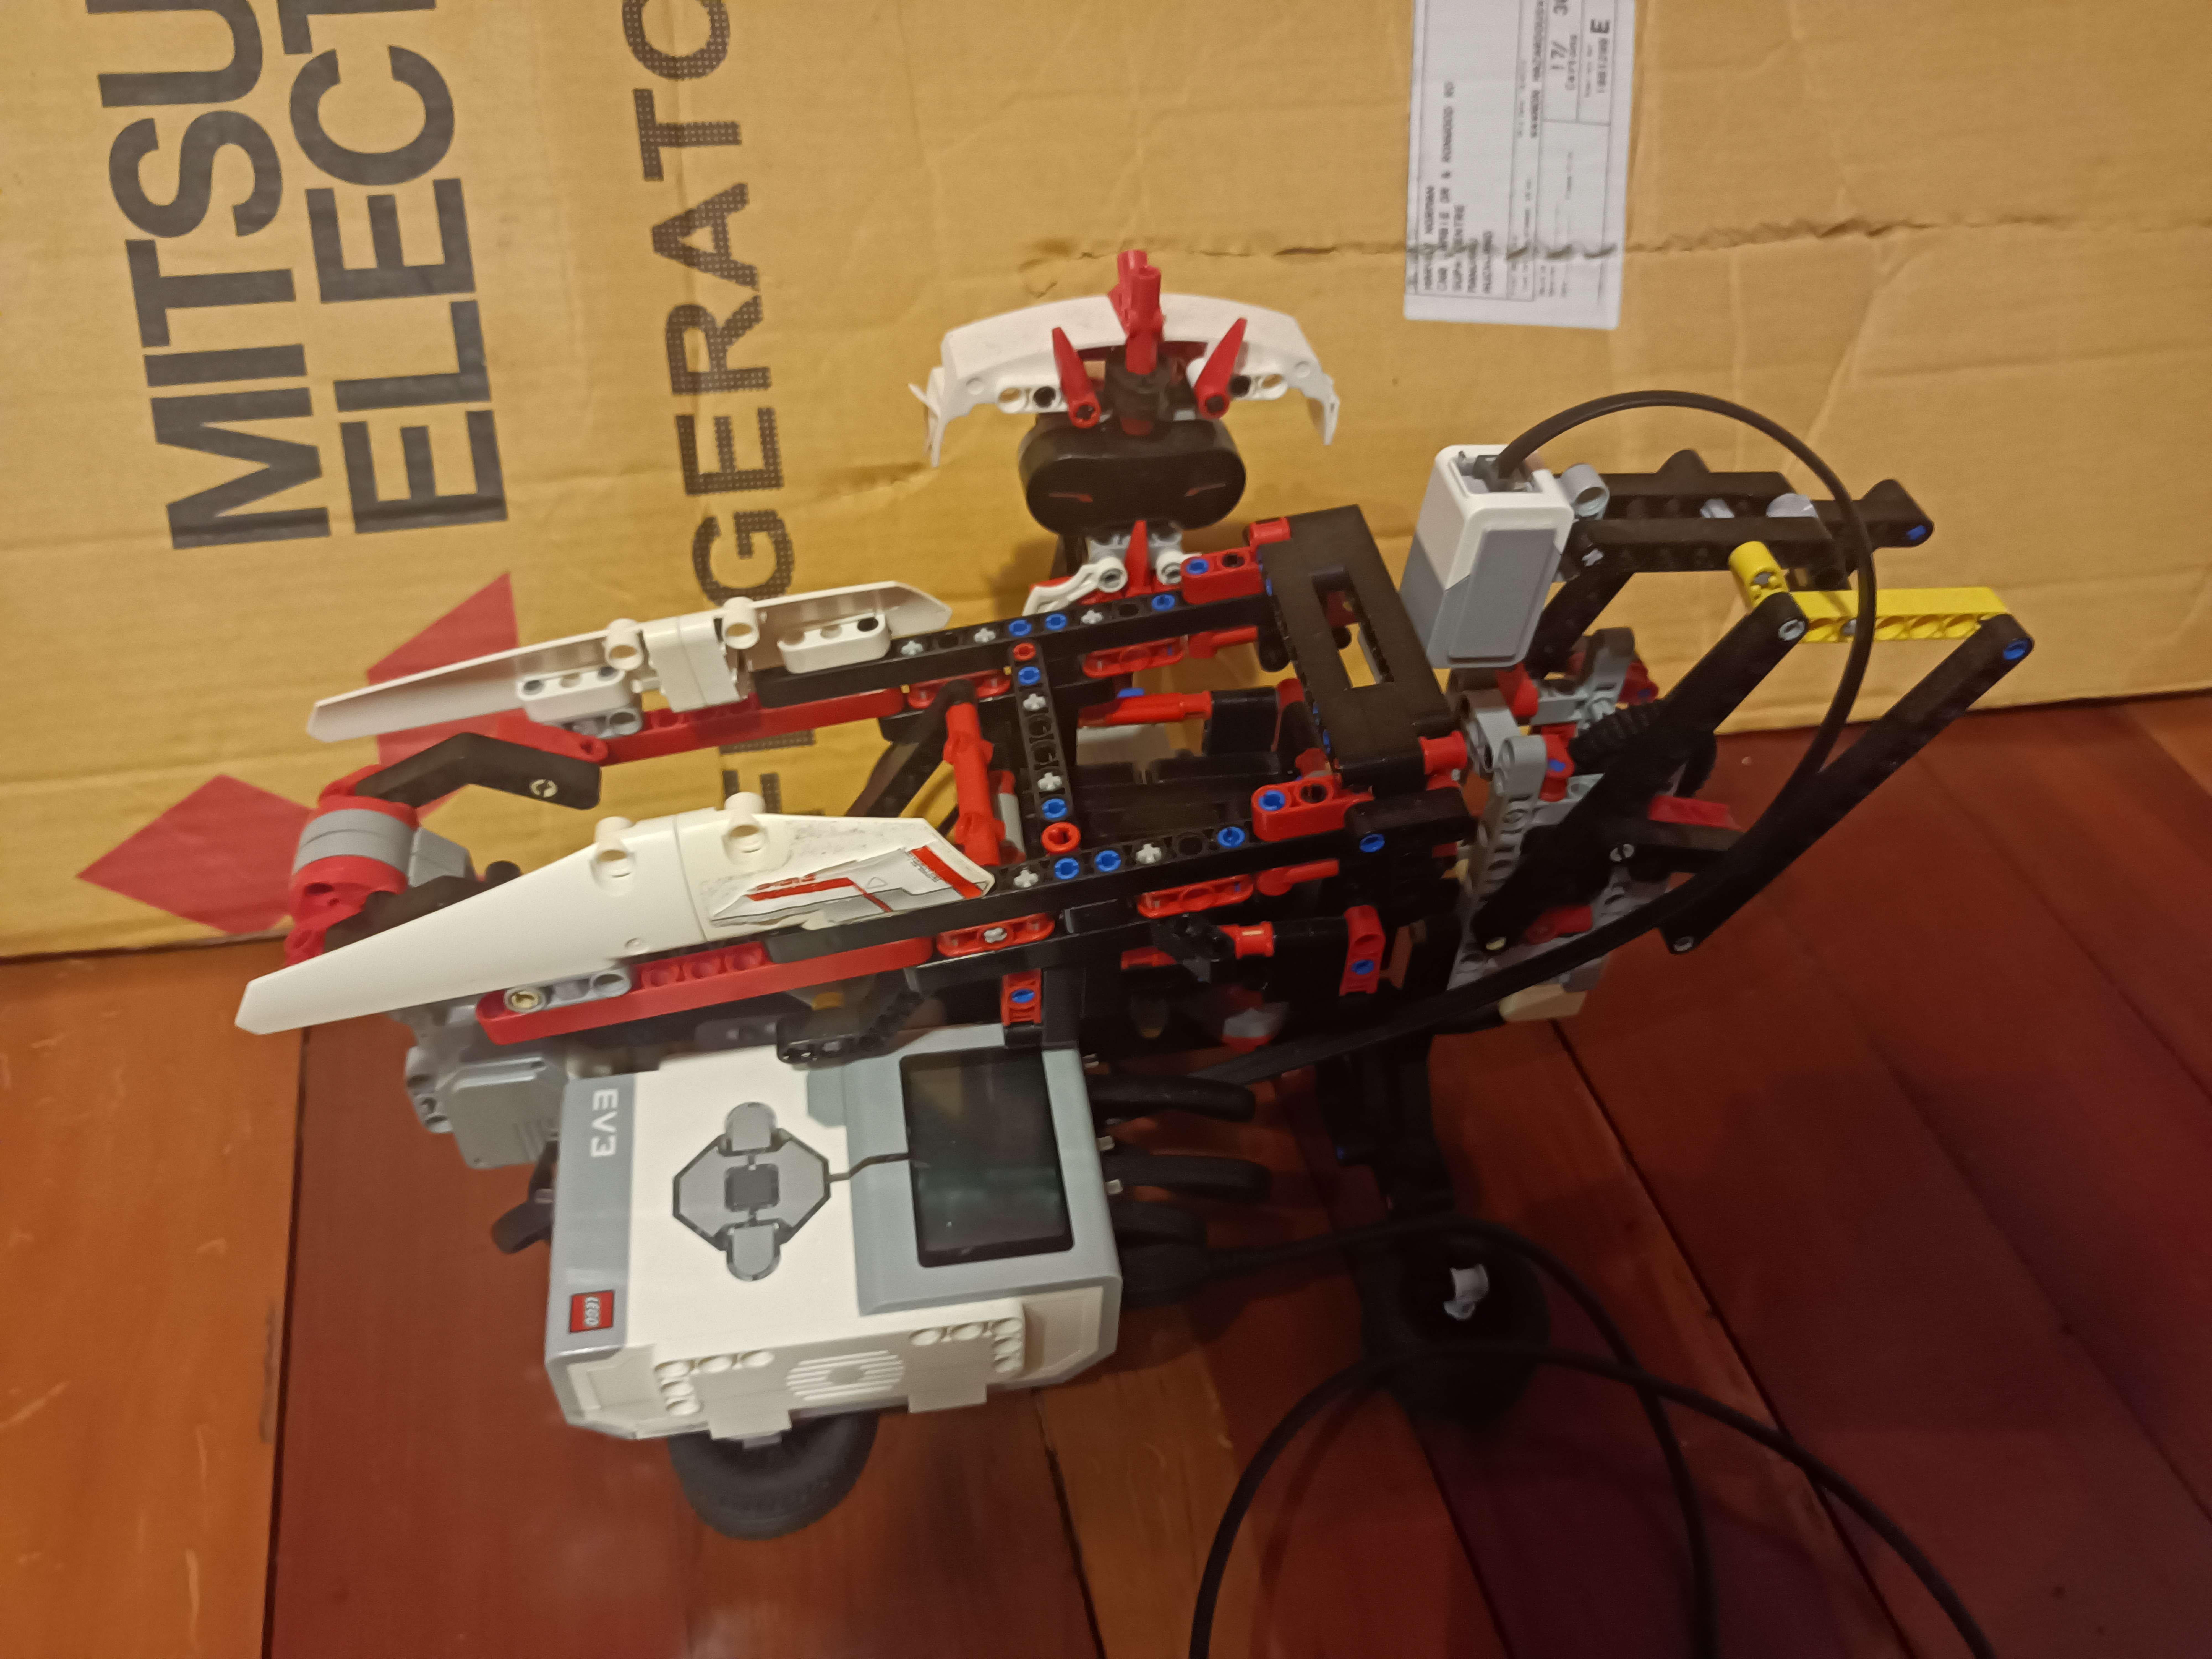
Robot Demo
The video below shows me scanning a Rubik's Cube, getting the computer to find a solution, and then the robot executing the sequence of moves to solve the cube.The Robot
The robot is built from a Lego EV3 kit. It actually is just the MindCub3r design, so I didn't come up with it myself. However, the software to control it is my own. Instead of the standard OS that the EV3 brick comes with, I use the ev3dev operating system, which is basically just a complete Linux distribution for the EV3 brick, and I find it gives me much more flexibility and control over the robot. Namely, it allows me to use Python to control the robot, and communicate with it via TCP (with internet over USB) to send commands to the robot.The sensors on the robot are actually unused. I did try to use the colour sensor to scan the cube, but I could not get a good colour reading. I am not sure if I am doing something wrong or if there is an issue with the sensor. Instead, I use a webcam to scan the cube.
Programming the robot from scratch was a bit of a challenge, since I needed to figure out exactly how to move the motors to turn and rotate the cube, with the added challenge that any console output gets printed on the tiny screen of the brick in small font (although I did figure out how to forward that to my computer when debugging). Actually, one of the reasons I decided to do this whole project and program the robot myself is that the original MindCub3r software (which is closed-source) was made for a different brand of Rubik's Cube than the one I owned, so by default it couldn't always recognise the colours of the cube correctly, and it would sometimes not be able to perform turns (since my cube is slightly smaller than standard). Some of the challenges and solutions I came up with are:
- When the program starts, it does not know the orientation of the cube receptacle and of the arm. So, on startup, I automatically slowly move the arm back until some resistance is felt, and then I know the arm is fully retracted.
- For the cube receptacle, the best solution I found to ensure it is properly aligned is to just get the user to rotate it until it is aligned, using the buttons found on the brick, when the program starts up.
- Because there is a little bit of extra space between the cube and the receptacle walls (because the cube is slightly smaller than the original design intends, and it is hard to make the Lego be perfectly sized), the cube doesn't turn exactly with the receptacle. If the turns were performed naively, this would result in turns not getting fully completed, which can mess up cube alignment later down the line and cause the robot to fail to perform some moves. The solution is actually quite simple: instead of just performing a 90 degree turn, I perform a 110 degree turn, which results in the move being completed, and then turning back 20 degrees. I have found this to be incredibly reliable.
- Quite a bit of fine-tuning had to go into the movement of the arm, to always ensure it fully grasped the cube, flipped the cube and retracted when needed.
The Algorithm
The main algorithm I use to solve the cube is Kociemba's algorithm, which is well described on Herbert Kociembas website. I also implemented Korf's algorithm — it's purpose is just to find a single, optimal solution. This can take a while. Instead Kociemba's algorithm is designed to find near-optimal solutions very quickly, and running it longer actually yields better solutions. If it is run for long enough, it will find an optimal solution, but this can take a while.The Interface
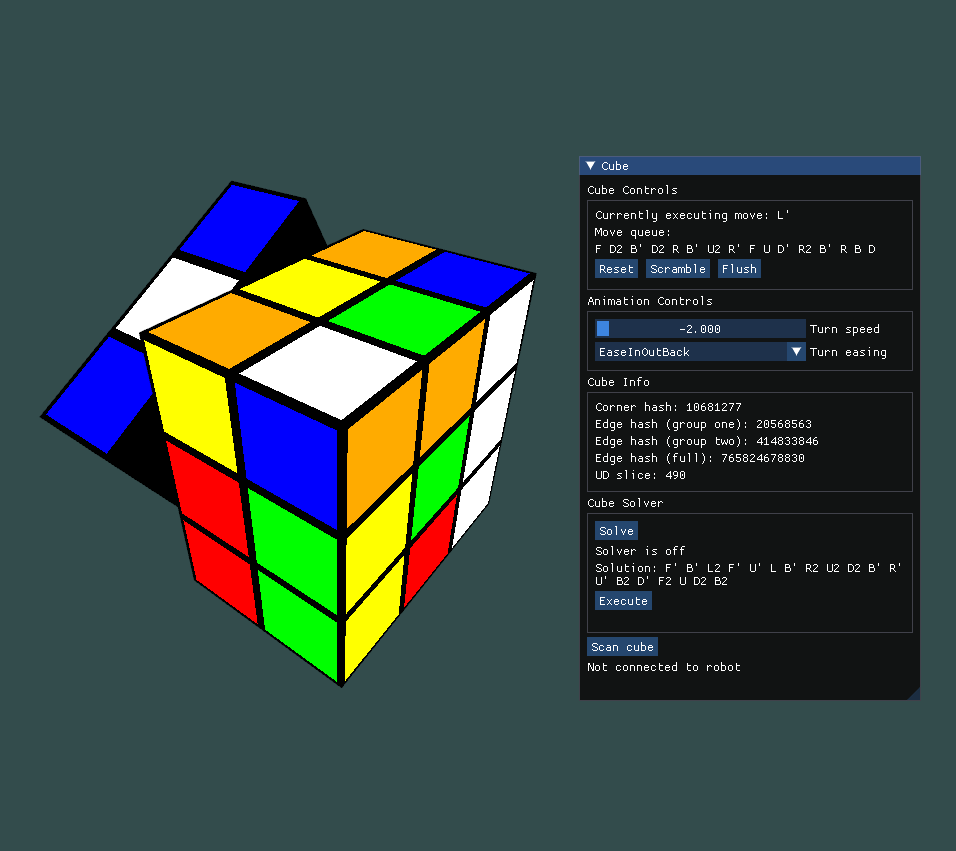
How to use
The first time the program is run, it will take a while to generate the lookup tables before actually opening the window.When the menu isn't open (you open and close it using the ESC key), you can move around the cube using the WASD keys, and the shift (down) and space (up) keys. You can pan with the mouse.
When you are in the menu, you can do the following:
- Perform a move on the cube by hitting the U, D, L, R, F, B keys (for Up, Down, Left, Right, Front and Back faces respectively). These will perform a single clockwise turn of the face.
- These key presses can be combined with the Shift key to perform a counter-clockwise turn instead. Holding CTRL+Shift performs a 180 degree rotation.
- In the menu, the "Reset" button, resets the cube to its initial, unscrambled state.
- The "Scramble" will add a sequence of random moves to the move queue (while making sure no consecutive moves are redundant), to shuffle the cube.
- The "Flush" button will immediately execute all moves in the queue, instead of waiting for them to be animated.
- The "Turn Speed" slider allows you to adjust the speed at which the cube turns during animations.
- The "Turn Easing" dropdown allows you to select which easing function to use for the turn animations. This will change the feel of the animation. By default it is set to the one I found most visually appealing, but you can try out the others.
- The cube info section shows how the solving algorithms see the current cube (as a set of numbers). This was mostly used for debugging purposes, but I have chosen to leave it in since it is still kind of cool. By referring to a cube's position with only a couple of numbers, the solving algorithms can perform moves incredibly efficiently, with only a couple of table lookups per move. Additionally, these codes are also used to make use of the symmetries of the cube, to make the lookup tables smaller.
- The "Solve" button will launch the cube solver. While the solver is running, you can see the length of the best solution that has been found.
- Once you think the solver has run for long enough, you can press the "stop" button. Then, it will show you the solution it found.
- If the solver actually finds an optimal solution, it will automatically stop and display this solution.
- Clicking the "Execute" button adds all of these moves to the move queue, to actually solve the cube.
- The "Scan" button will open a window which will prompt you to show each face of a Rubik's Cube to the camera, so that the program can try scan the cube.
- The whole robot section is used to connect to the actual robot. This requires quite a bit of setup (including assembling the robot :P) and is a little janky, so I have not included instructions yet.